A few things before getting started:
1. Make sure everything is unplugged from the machine and you have a good, clear working surface.
2. Make sure you do not expose any of the components to magnetism (such as from a magnetic screw driver).
3. It is recommended that you stay off of carpet when doing this or you are grounded to prevent static discharge.
Note: It is critical that you stay organized and that no screws are lost when changing the components. This lesson goes through accessing/replacing the LCD display and control panel. The machine is reassembled in the reverse order it is disassembled.
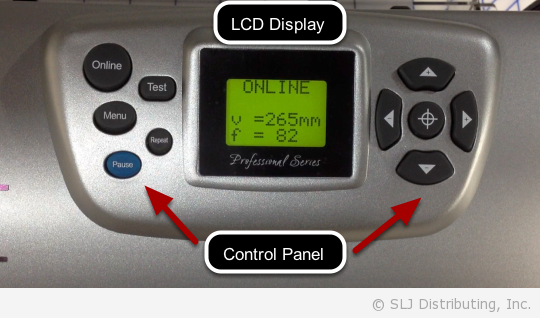
This tutorial discusses how to replace both the control panel and the LCD display.
Remove the End Caps
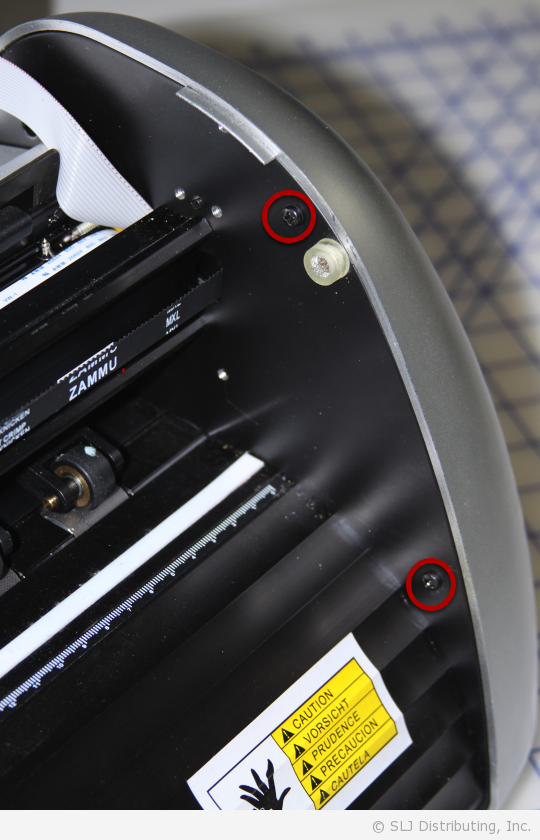
While it is possible to replace the LCD display/control panel by only removing the right end cap, it is recommended that both be removed.
There are four screws holding each end cap in place. There are two screws for each side accessible from the front of the machine (one is under the lid) and two in back.
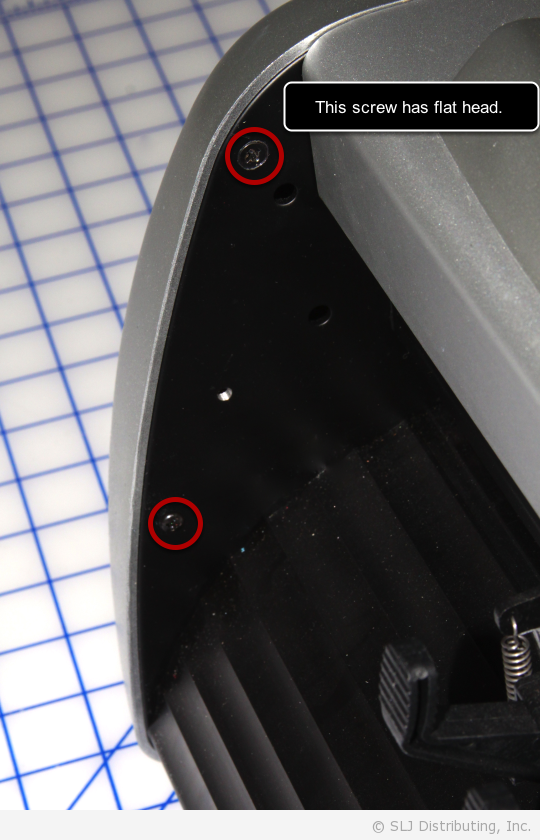
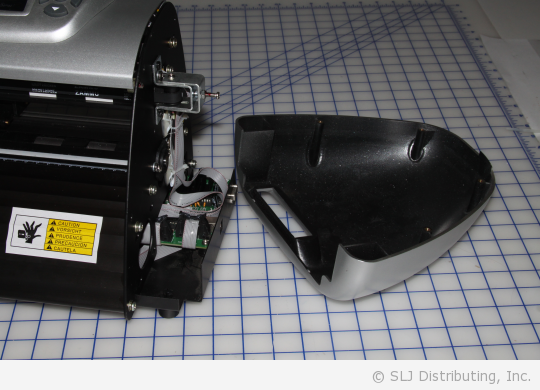
Gently, pull away the right end cap. Do thesame for the left end cap.
Remove the Machine Base
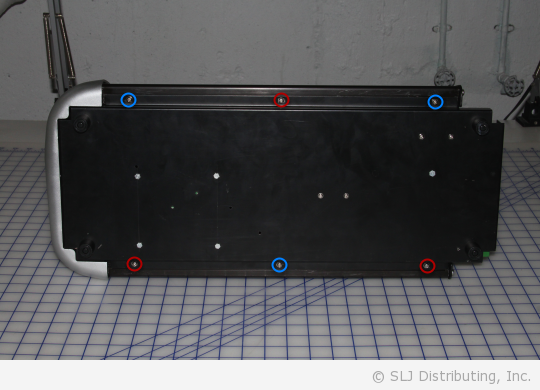
Tilt the machine onto its back. Remove the 6 screws (8 screws for larger machines). Loosen the red screws first, followed by loosening the blue screws. Then, remove the red screws, followed by removing the blue screws. While the order is not critical for removing the base, if this is not followed for reattaching the base, it will be difficult to line everything up properly.
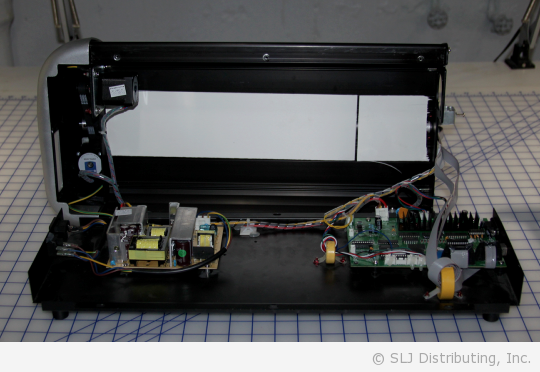
With the screws removed, you can carefully swing the base down towards you.
Detach the Cables
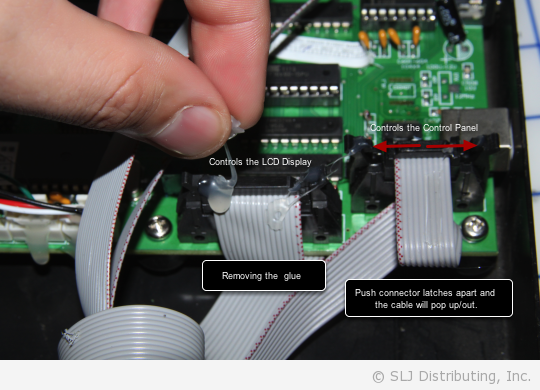
You will notice the motherboard has now been exposed. Carefully, detach the two gray cables by pushing the latches on the connectors outward. You may need to carefully remove the glue surrounding the connectors if there is any. The connector on the left is a bit wider and controls the LCD display. The connector on the right is slighly smaller and controls the button control panel.
NOTE: Be careful to not damage the motherboard.
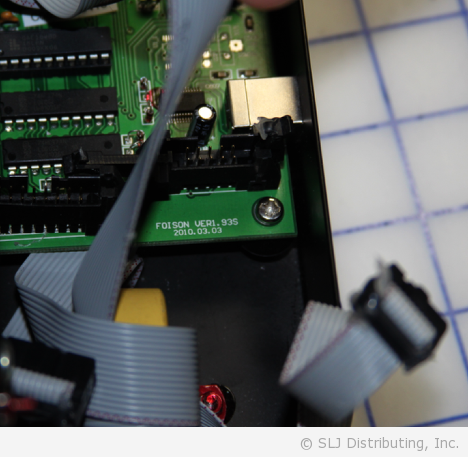
You can then disconnect the gray wires.
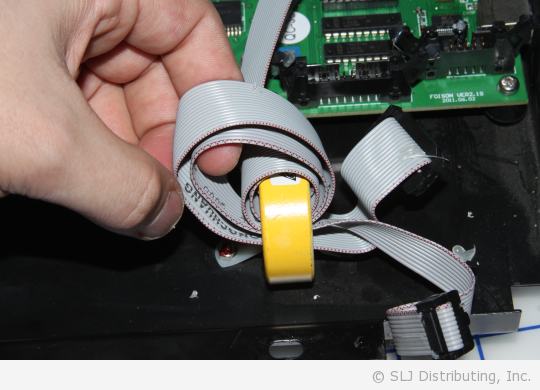
Thread the gray wires out of the static ring.
Note: Though you may have to loosen the LCD wiring, if you are only replacing the control panel, you only need to thread out the smaller of the two cords.
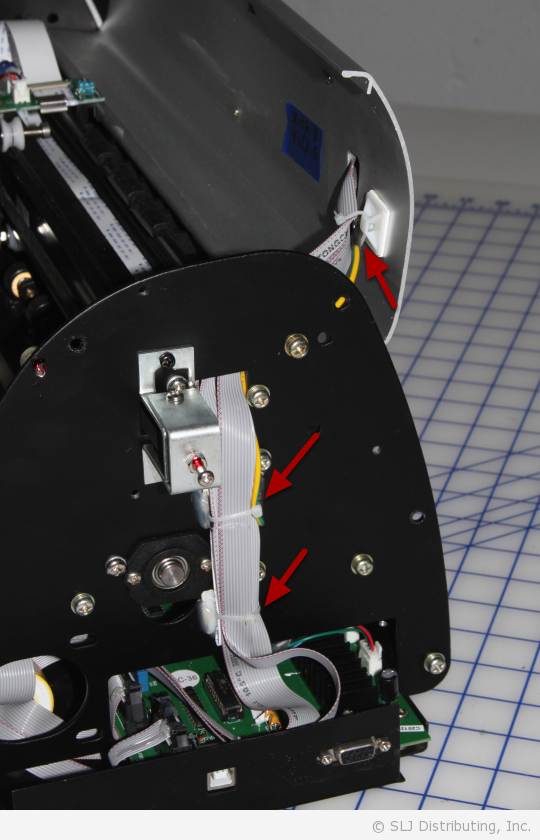
Carefully, upright the machine and lift the lid. Locate the zip ties anchoring the cables to the machine.
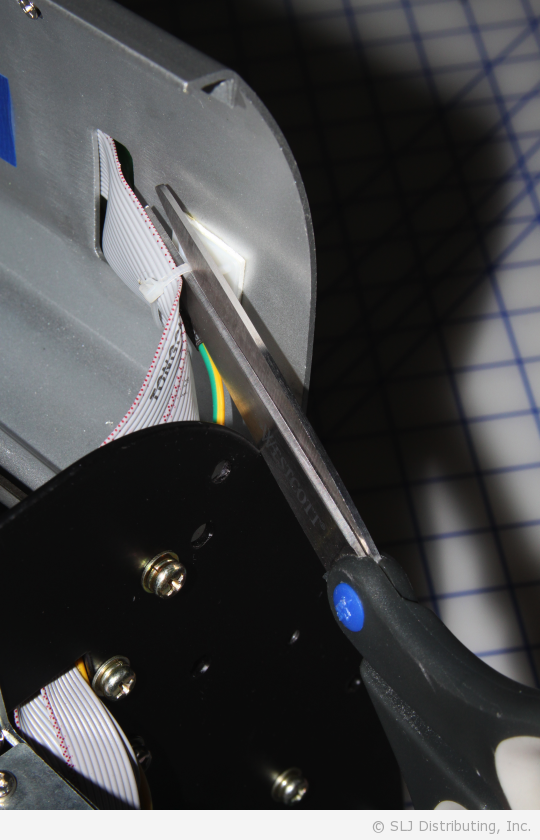
Using some scissors, carefully cut the plastic zip ties. Be careful not to damage any of the wiring.
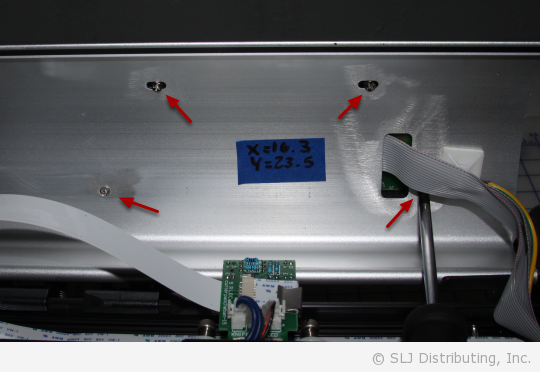
Remove the four screws under the lid. The LCD display/control panel casing should now come loose.
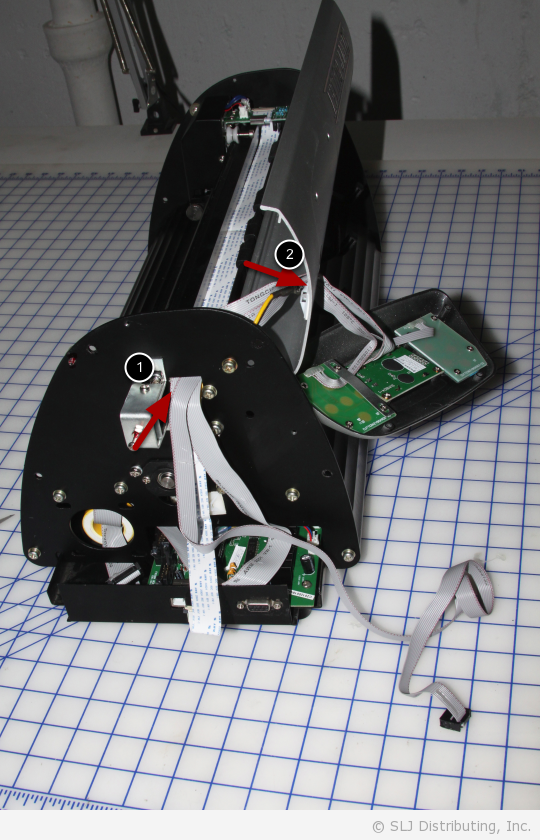
Thread the wiring up and through the machine holes.
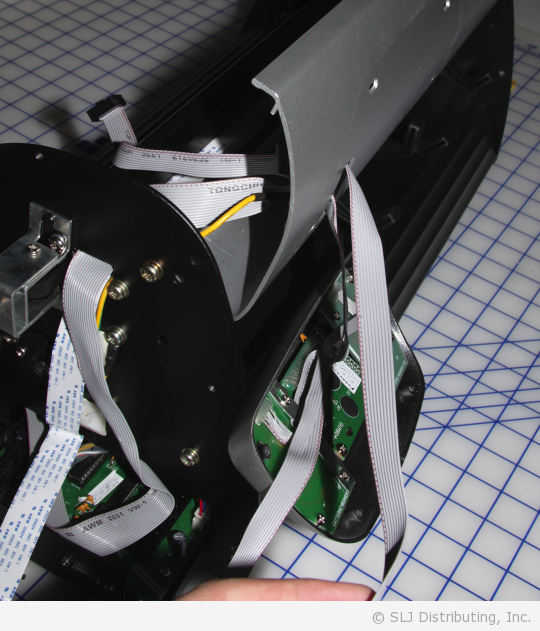
Remove the LCD Display
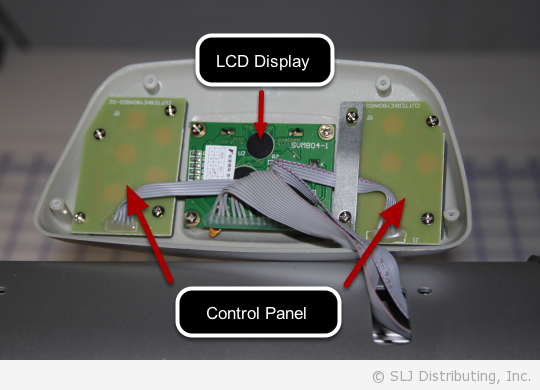
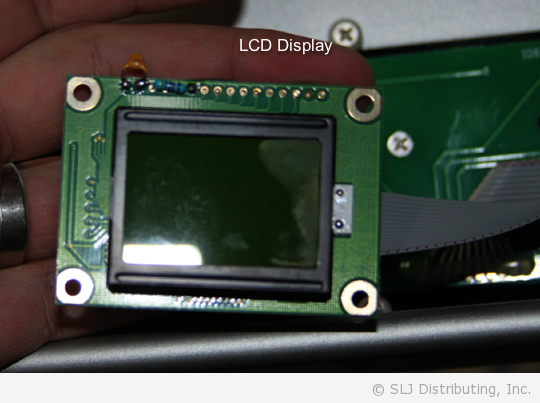
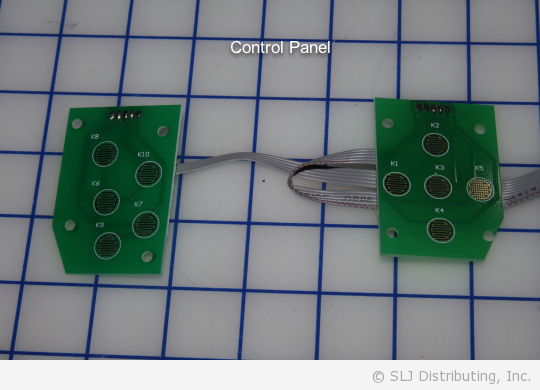
There are three circuit boards in the lid. One of them is the LCD Display (shown in the center) and the other two are the control panel, connected by the gray wiring. Each circuit board has four screws anchoring it down. The circuit board under the directional arrows has an additional bar that helps secure its wiring.
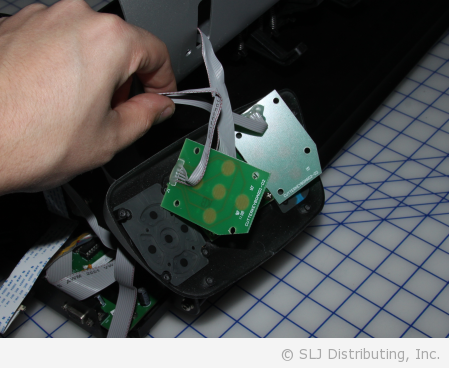
Remove the screws and you will be able to remove the necessary components. You can now swap out the necessary parts as needed and put the machine back together in the same order that it was disassembled.
A Few Notes and Reminders
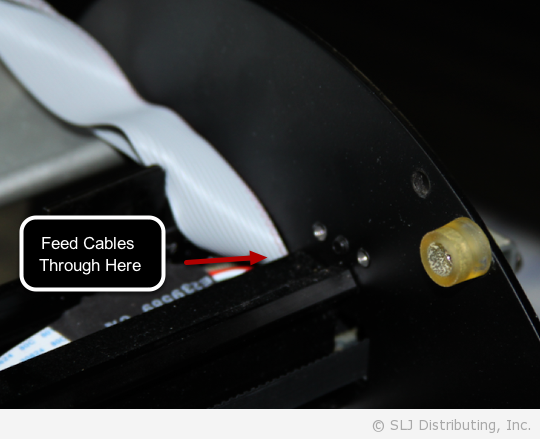
Gently feed both of the gray cables back through the cable hole where the previous cables were threaded. Remember that the cables feed through two holes in the machine body – the lid and the frame.
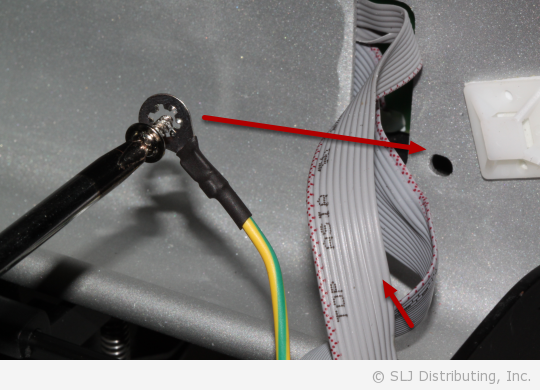
When reattaching the bottom right srew that anchors the control panel casing to the lid, be sure to thread it through the conduction wire.
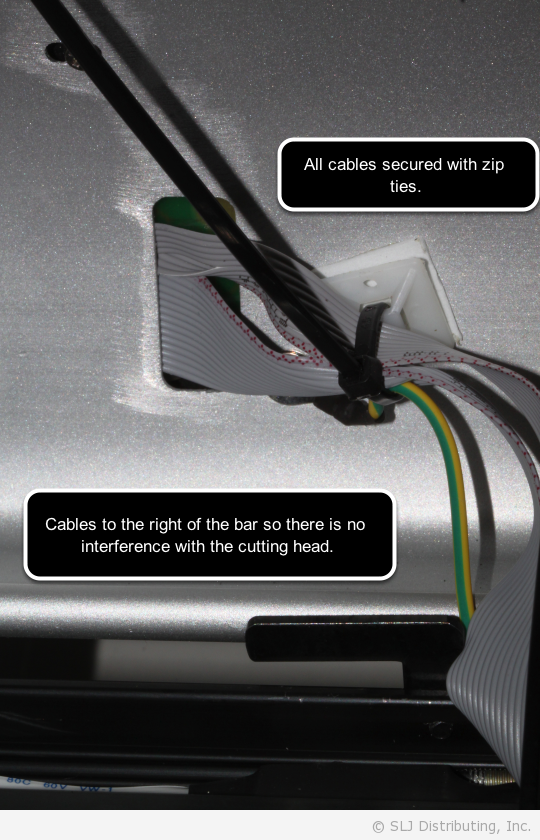
Make sure that the cables are positioned to the RIGHT of the L shaped bar so that it does not interfere with the cutting assembly. Secure the cables to the machine with the zip ties and cut off the excess zip tie material.
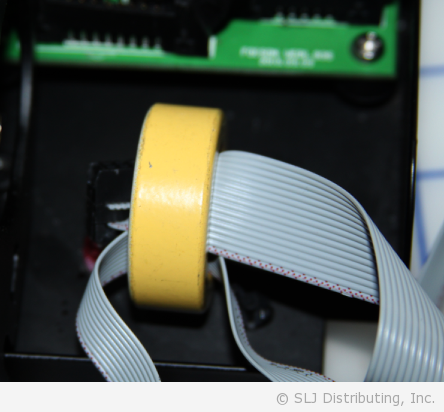
Remember to wrap both gray cables around the static ring as was done previously (three times).
NOTE: You may need to maneuver the larger cable through sideways.

